3. Creating a new project
This walkthrough is the main Getting Started path: you create a TechStack workspace, add projects to it, and build and run them from the Studio. Complete 1. Installation first, and read 2. Toolchains for the toolchain concepts used throughout.
What you'll build
- A TechStack workspace, created with the New Workspace Wizard.
- A console process, run first with the DataFlex Windows toolchain and then with a native TechStack toolchain, so you can see what the toolchain choice changes.
- A WebAssembly WebAppClient, a drilldown application that runs entirely inside the browser.
Step 1 — Create a new workspace
When you create a new workspace, the New Workspace Wizard asks whether it should use the DataFlex Windows toolchain or the new Technology Stack toolchain — the workspace flavor described in 2. Toolchains. Select Uses new Technology Stack toolchain.
Fill in the remaining fields: give the workspace a Name of the New Workspace, an optional Workspace Description, and a Workspace Root Directory. As with the samples, prefer a location outside your user directories — for example under C:\dev — to avoid permission issues later on. If the directory does not exist, the wizard creates it for you.
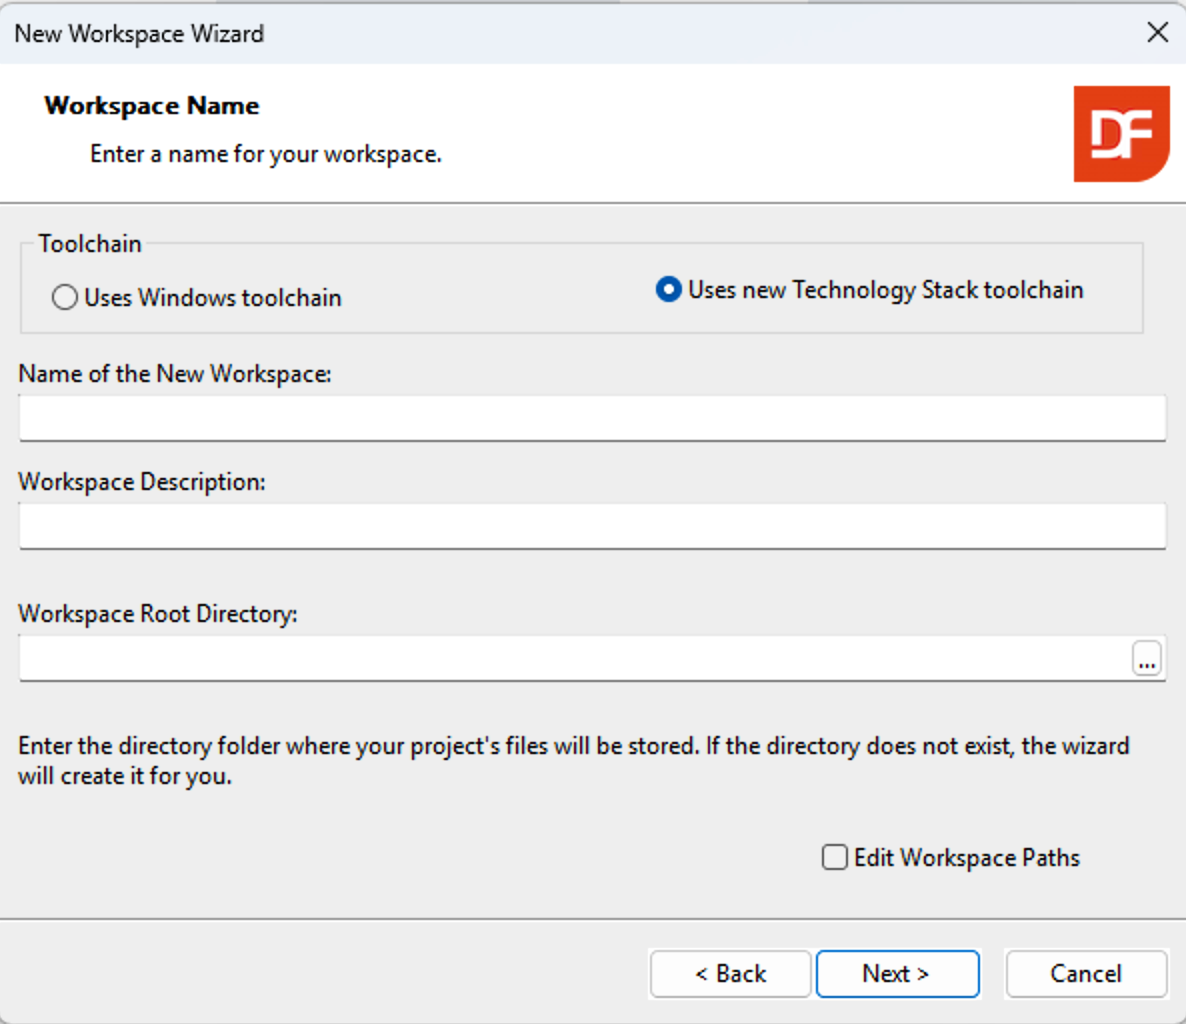
Click Next and continue through the wizard using the defaults to create the workspace.
Step 2 — Create a project
In this technical preview you can build two kinds of project: a Windows process-style application, and — the main focus — a WebAssembly-based Web UI Client, which we will refer to from here on as a WebAppClient. WebApp Server applications (WebAppServer) will be added later and delivered through package manager updates.
For this walkthrough, create a process using the Processes template under the Windows category in the Create New dialog.
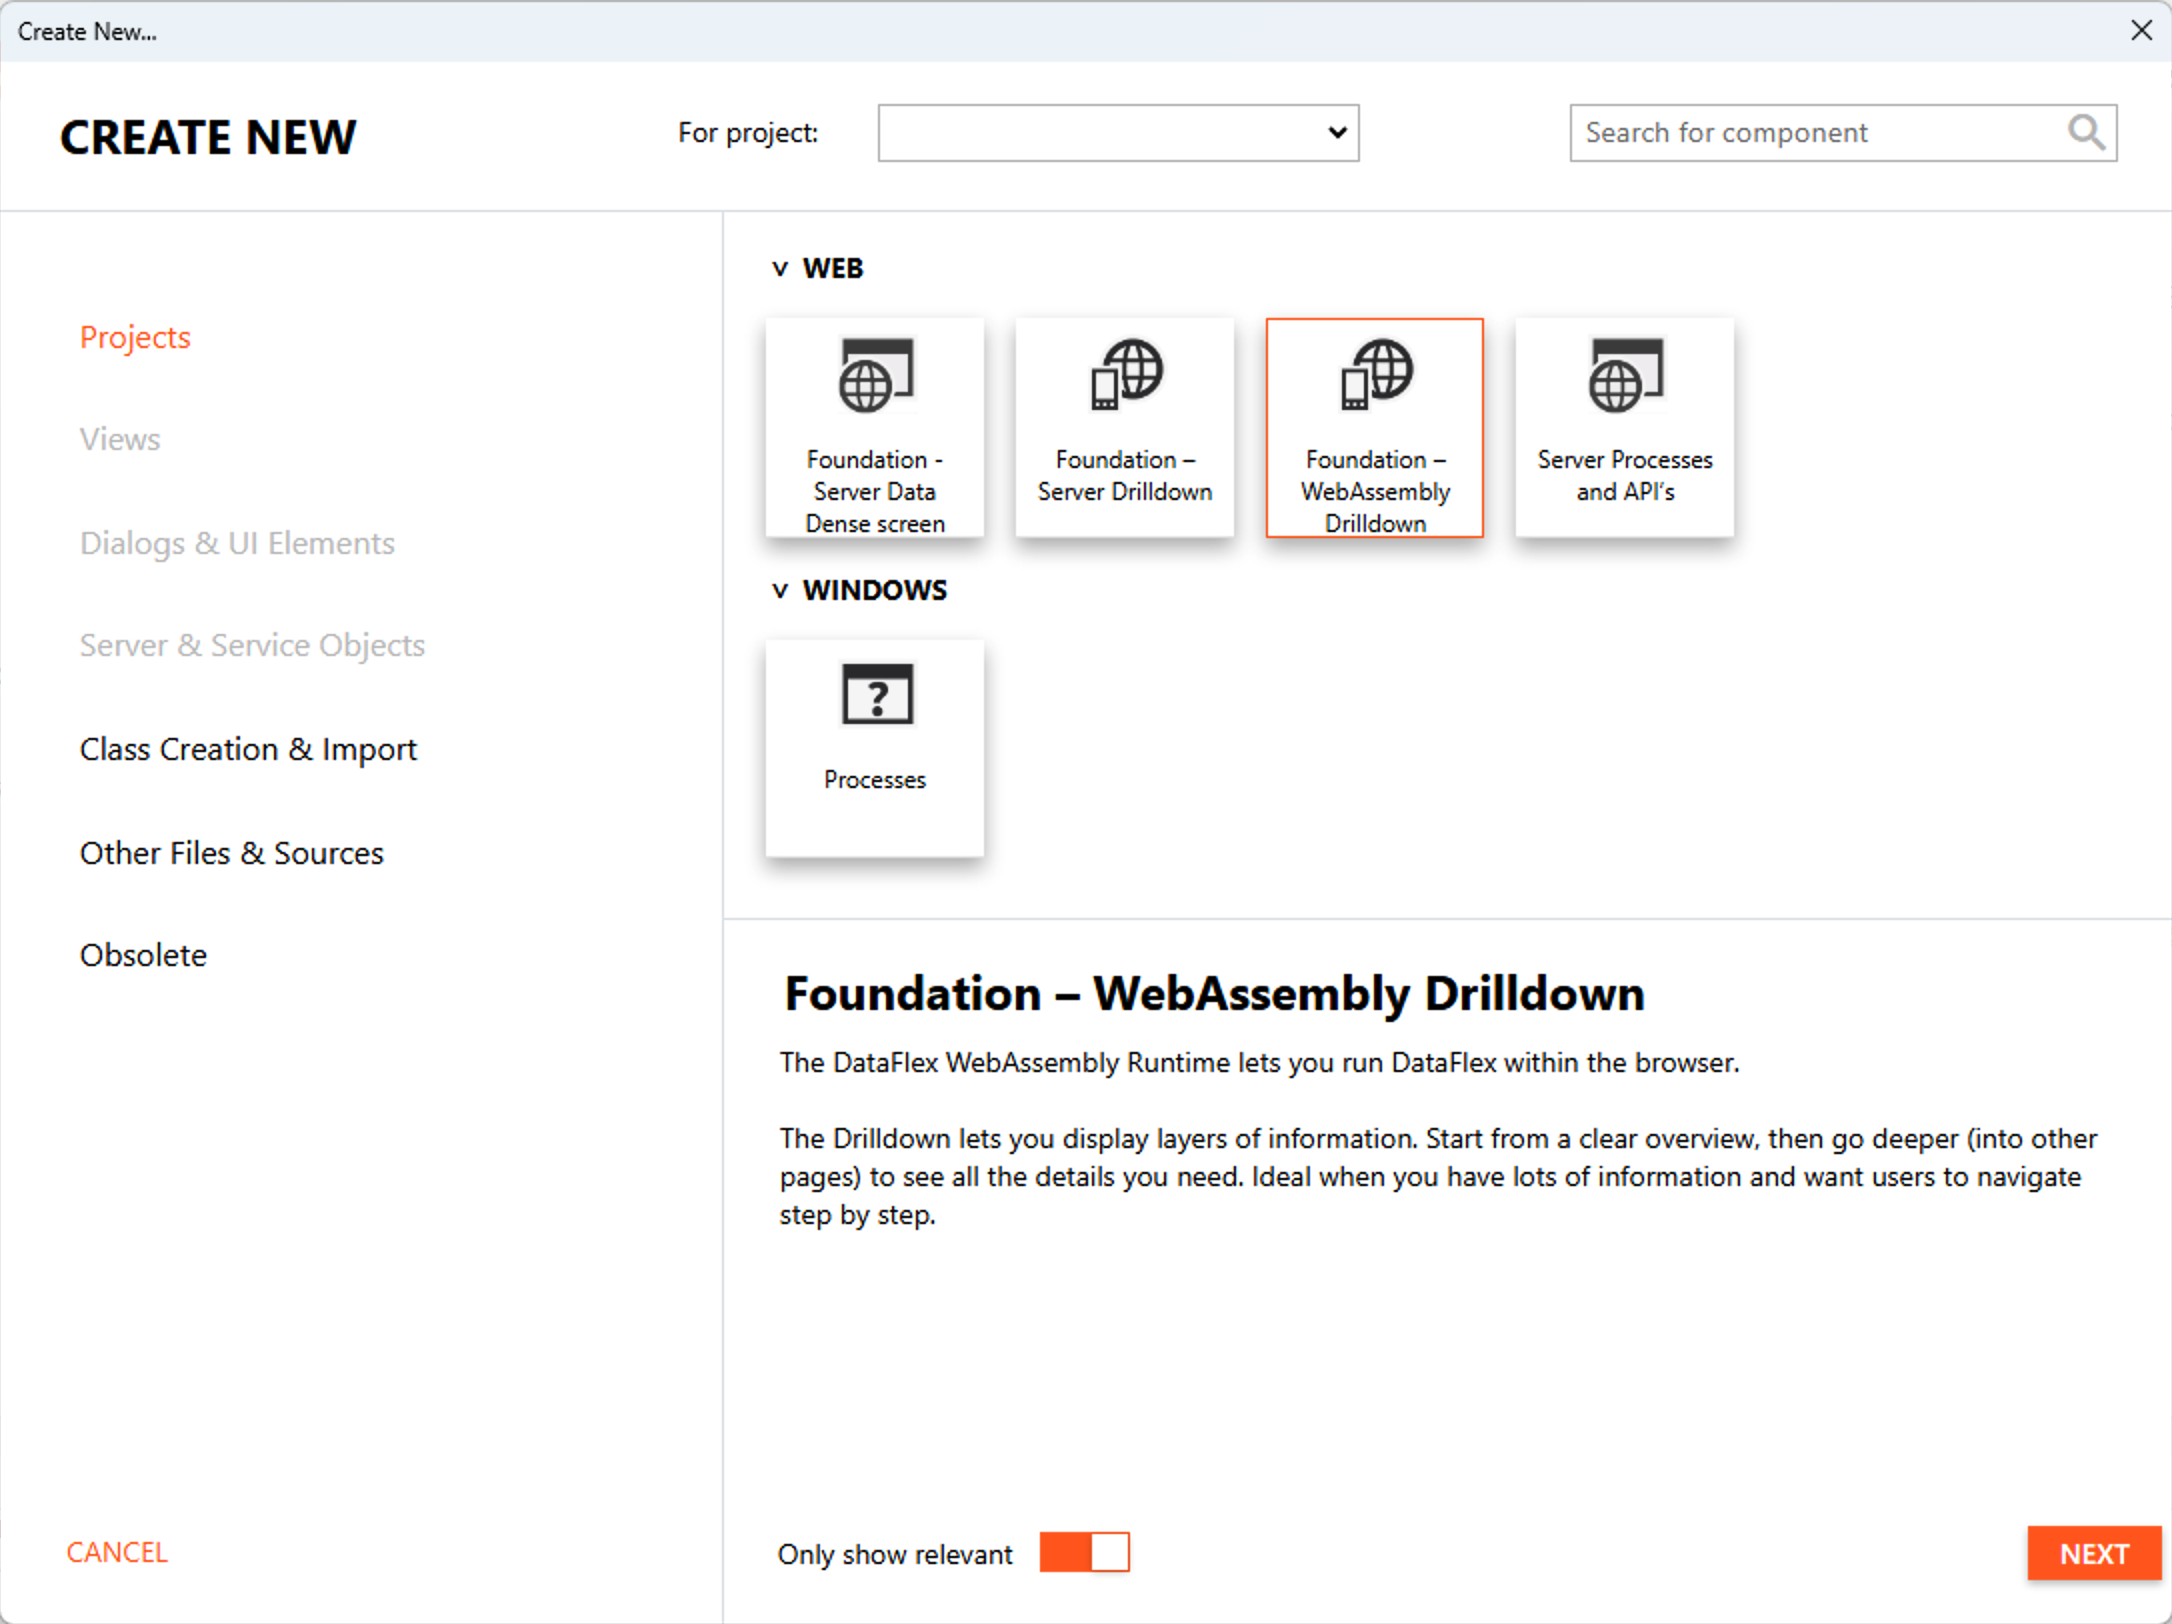
Name the project Test (or Toolchain test) — we will use it later to show the difference between toolchains.
Step 3 — Write the code and run it on DataFlex Windows
Overwrite the project's source code with the following:
Integer iVoid
Showln "Hello world!"
Inkey iVoid
For long-time DataFlex users this will look familiar: we declare a temporary Integer iVoid, print the line "Hello world!", and then wait for keyboard input.
First, let's see how this behaves under DataFlex Windows. Open the toolchain selector, choose More toolchains…, and select 27.0.0+windows-64 in the Select Current Toolchain dialog.
Run the program with F5 or the green play button in the Studio's top toolbar. The application is compiled and started in the debugger, and you are greeted by a debugger-style Output Window showing the printed line.
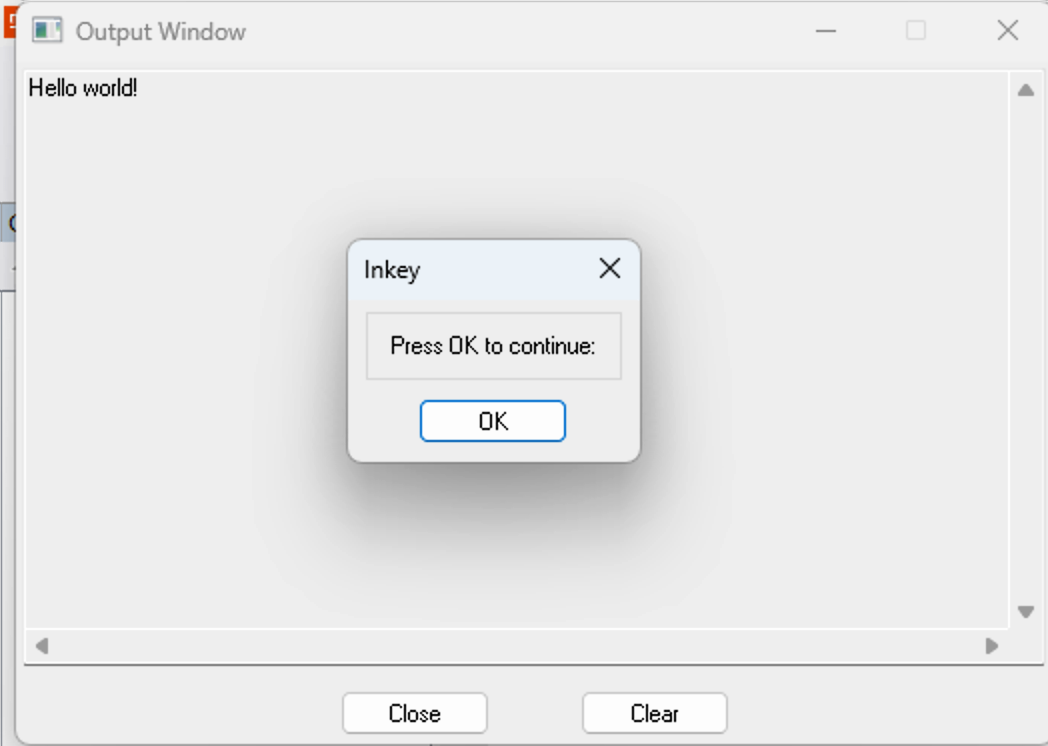
Press OK or ENTER and the program finishes, as written.
After execution finishes, look at the Output panel at the bottom of the Studio. While building and debugging, it reports exactly what the Studio did. You can see that compilation used the selected toolchain (27.0.0+windows-64), where the executable was written, and which path was used to run it.
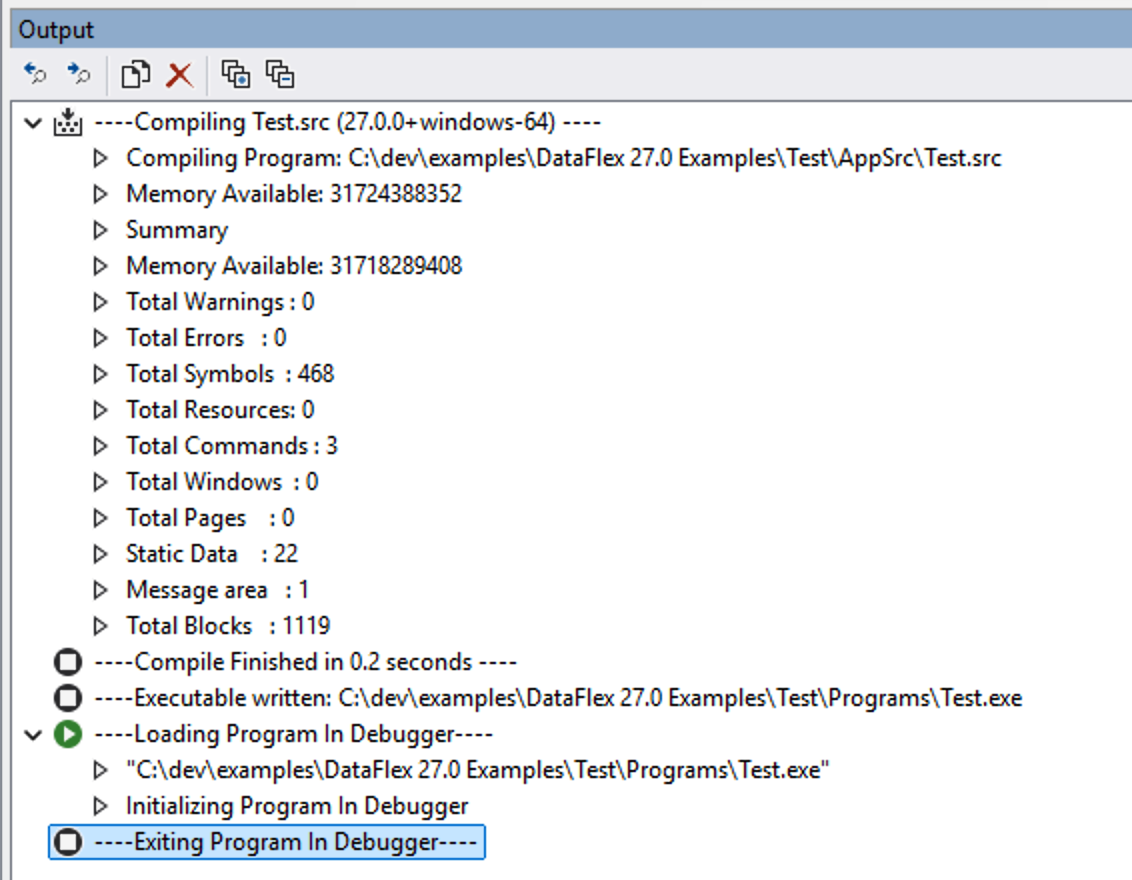
In this run the panel shows the source being compiled with 27.0.0+windows-64, the executable written to ...\Test\Programs\Test.exe, and that same executable loaded and run in the debugger.
Step 4 — Switch the toolchain to TechStack native
Now switch the toolchain to 0.1.*+native-64. native-64 is the platform name for native, cross-platform DataFlex TechStack applications — think Windows, Linux, macOS, and FreeBSD. With this toolchain, as long as you don't rely on Windows-specific behavior yourself, your application is guaranteed to run on all native platforms.
Build and run again with F5 or the play button. This time something different happens: the application starts in a command prompt instead.
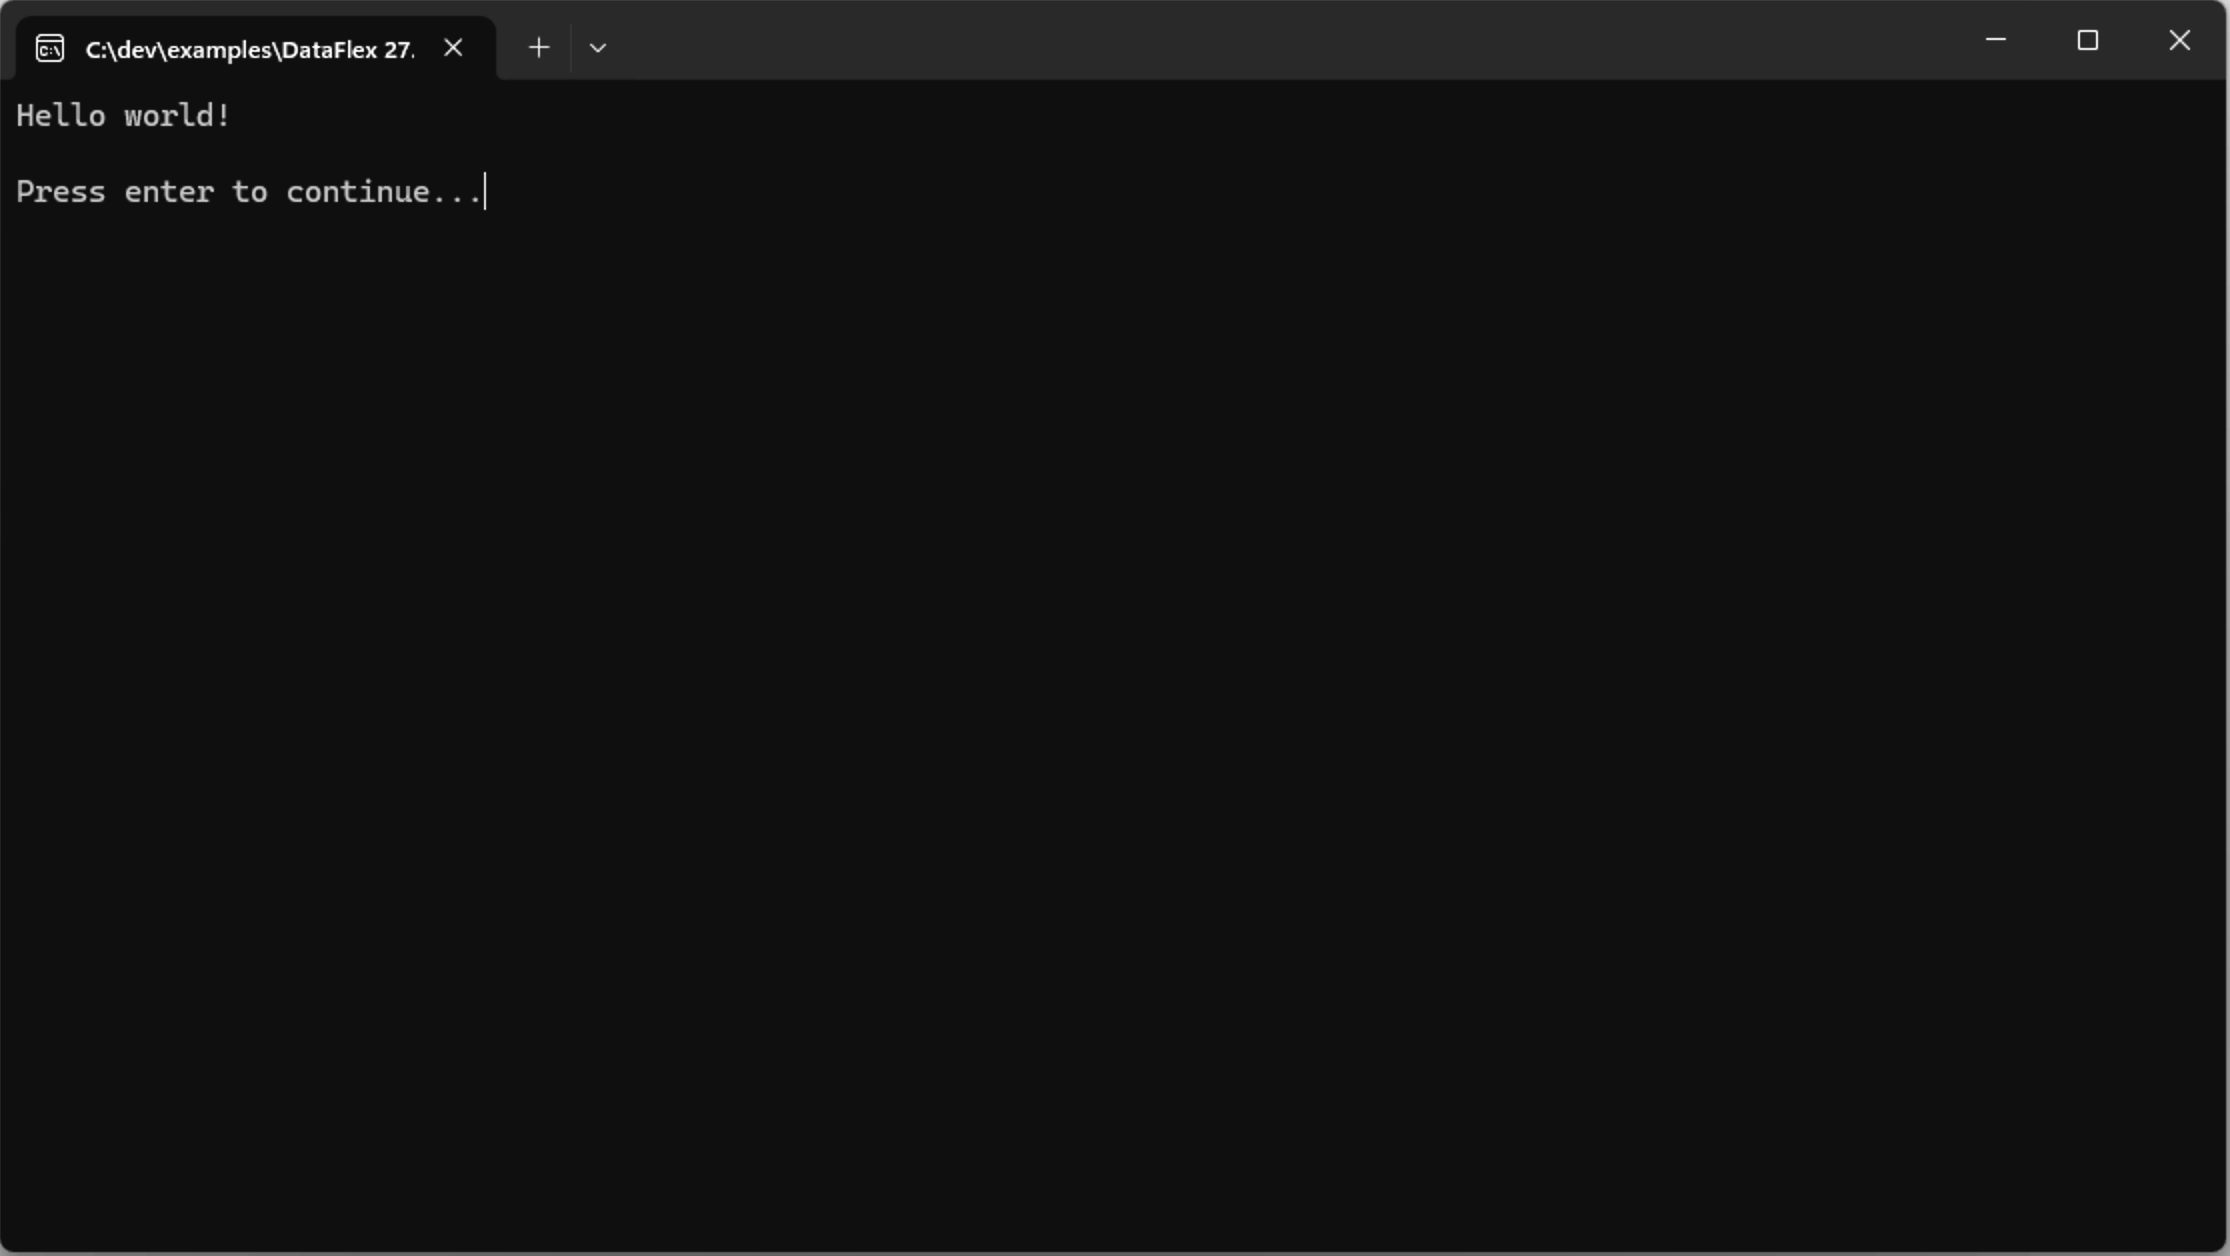
This is because TechStack applications are command-line ("headless") applications by default. Options to mark an application as a UI application instead will be added later; for now this is what we work with. You can see the same Hello world! output, now asking you to press enter.
When native runtimes for other platforms are released — for example macOS — the same behavior happens there as well.
As a note for later: when using a WebAssembly-based toolchain, the same code runs there too, except the Showln output moves to the Developer panel's Console output.
When execution finishes, look at the Output panel again. It shows that the new toolchain (0.1.6+native-64) was used, and that we once again produced an .exe — worth noting for later.
The debugger output is also different now. You can see which DLLs and other components your program loads as the runtime and your program require them. Two are especially important:
dfvm-runtimelib.dll— the actual runtime.platform-lib.dll— platform-agnostic APIs the runtime uses to interact with the current platform (here, Windows).
Both are loaded from the toolchain directory (C:\ProgramData\DataFlex\Toolchains\0.1.6+native-64\bin64).
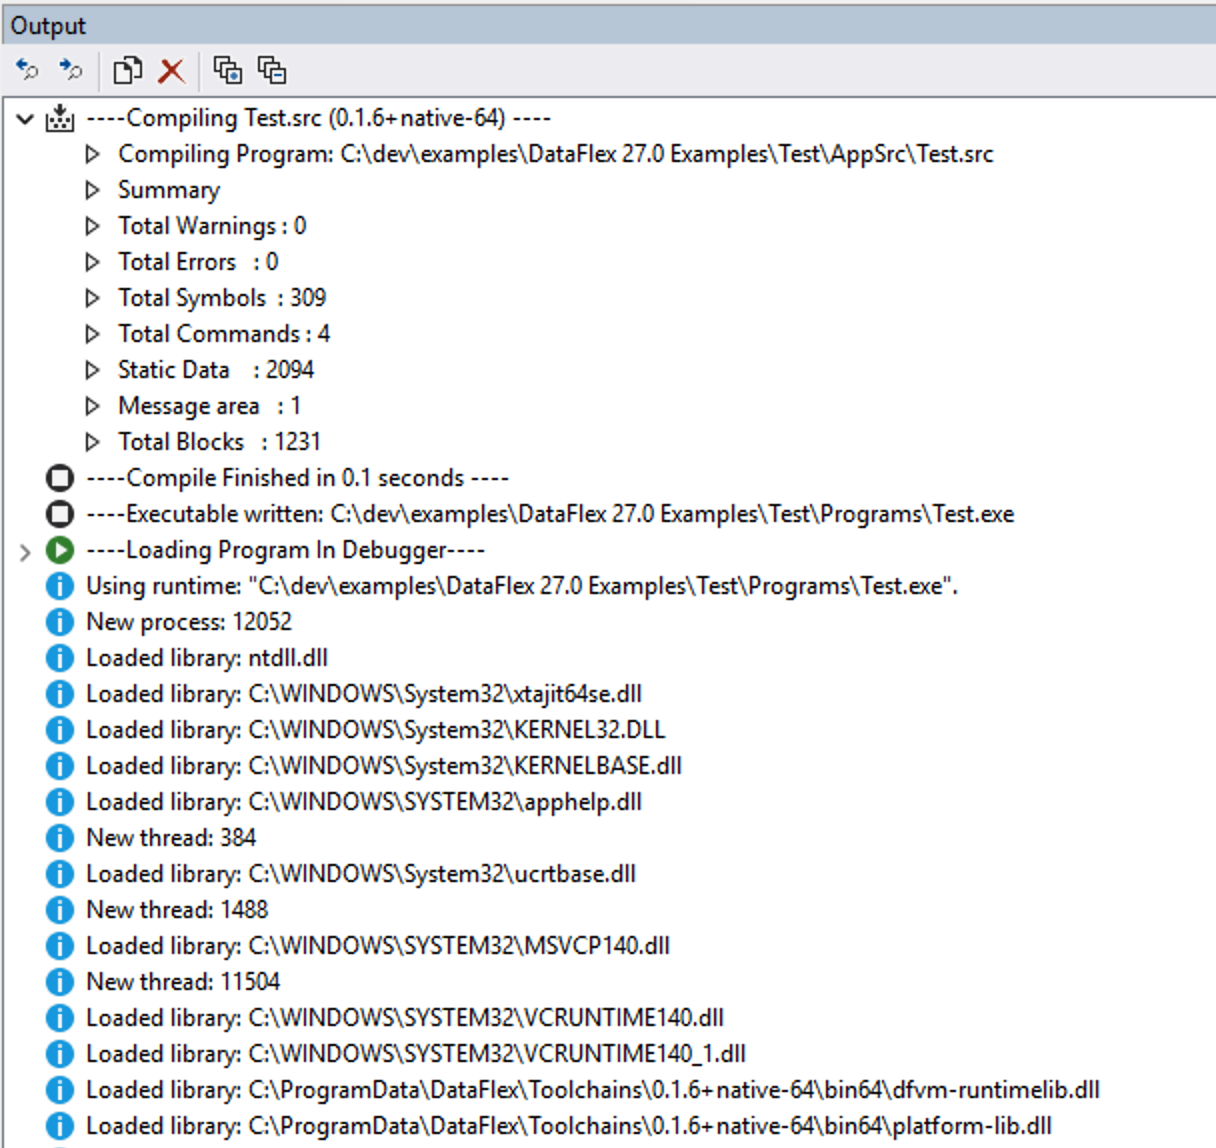
This is purely informational, but can be useful in the long run — any External_Function calls and similar dependencies also show up here as they are loaded.
Step 5 — Create a WebAssembly-based WebAppClient project
Now let's switch it up and add another project. In the Create New dialog, under WEB, select the Foundation – WebAssembly Drilldown template.
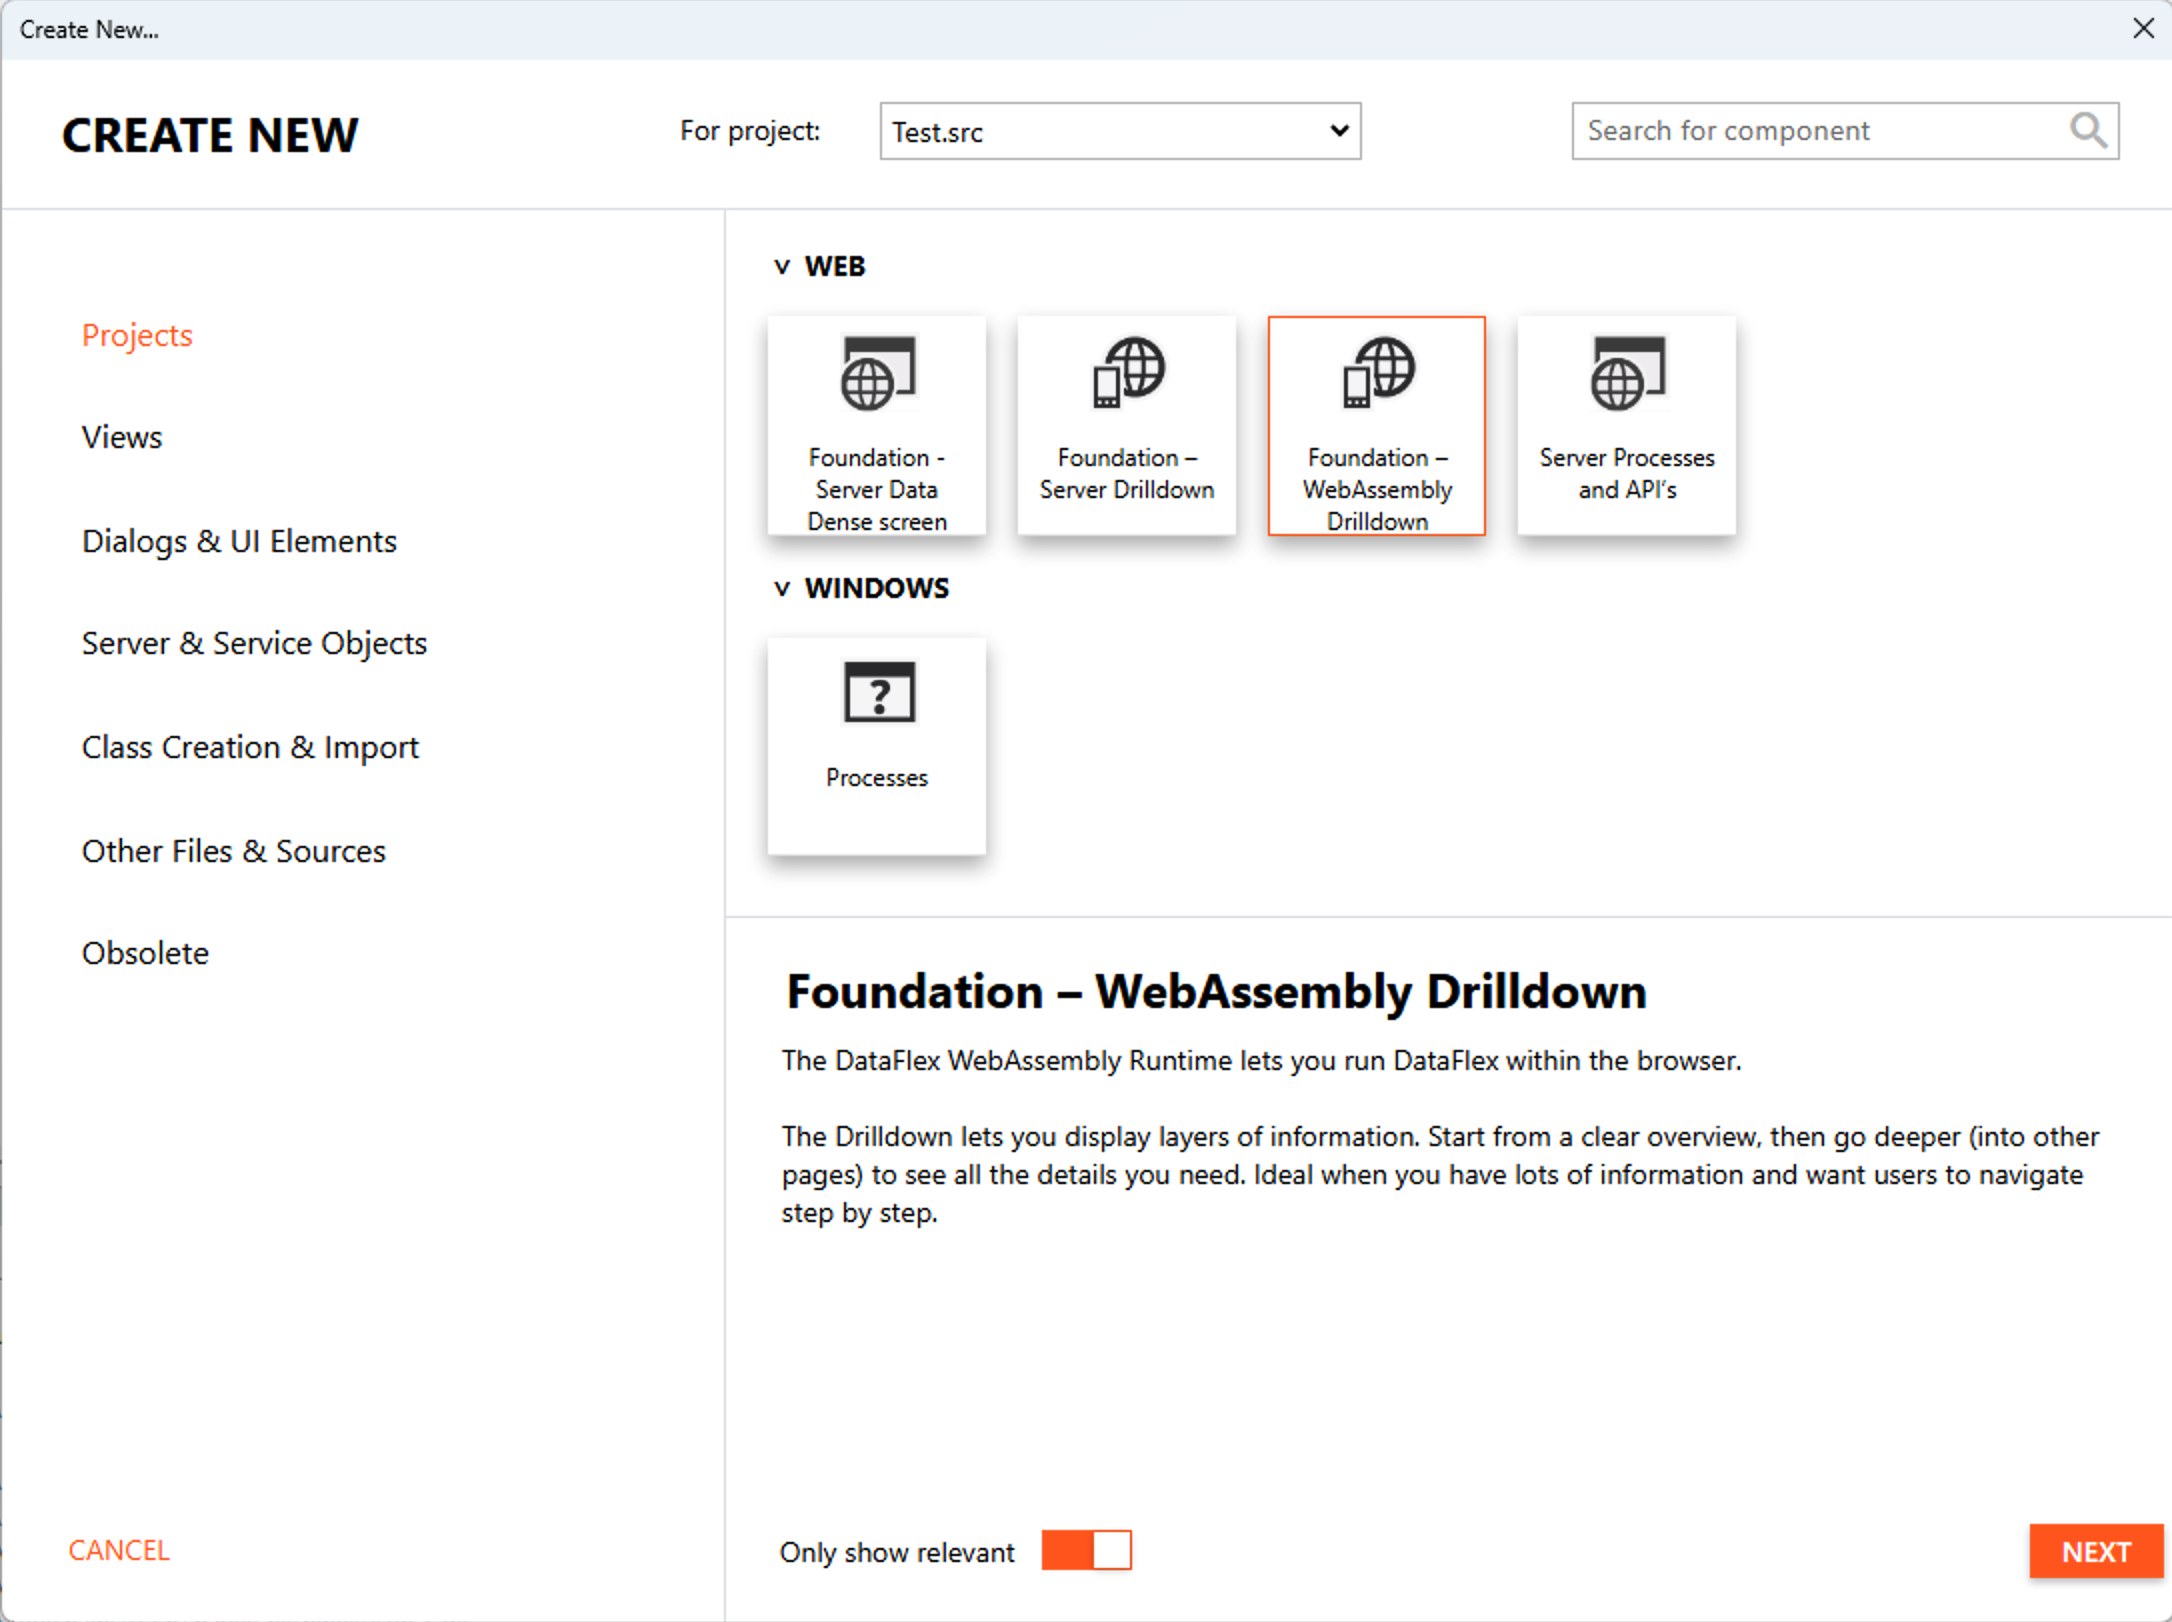
The DataFlex WebAssembly Runtime lets you run DataFlex within the browser. The Drilldown lets you display layers of information: start from a clear overview, then go deeper into other pages to see the details you need — ideal when you have a lot of information and want users to navigate step by step.
After selecting the template, a new-style wizard appears with some options.
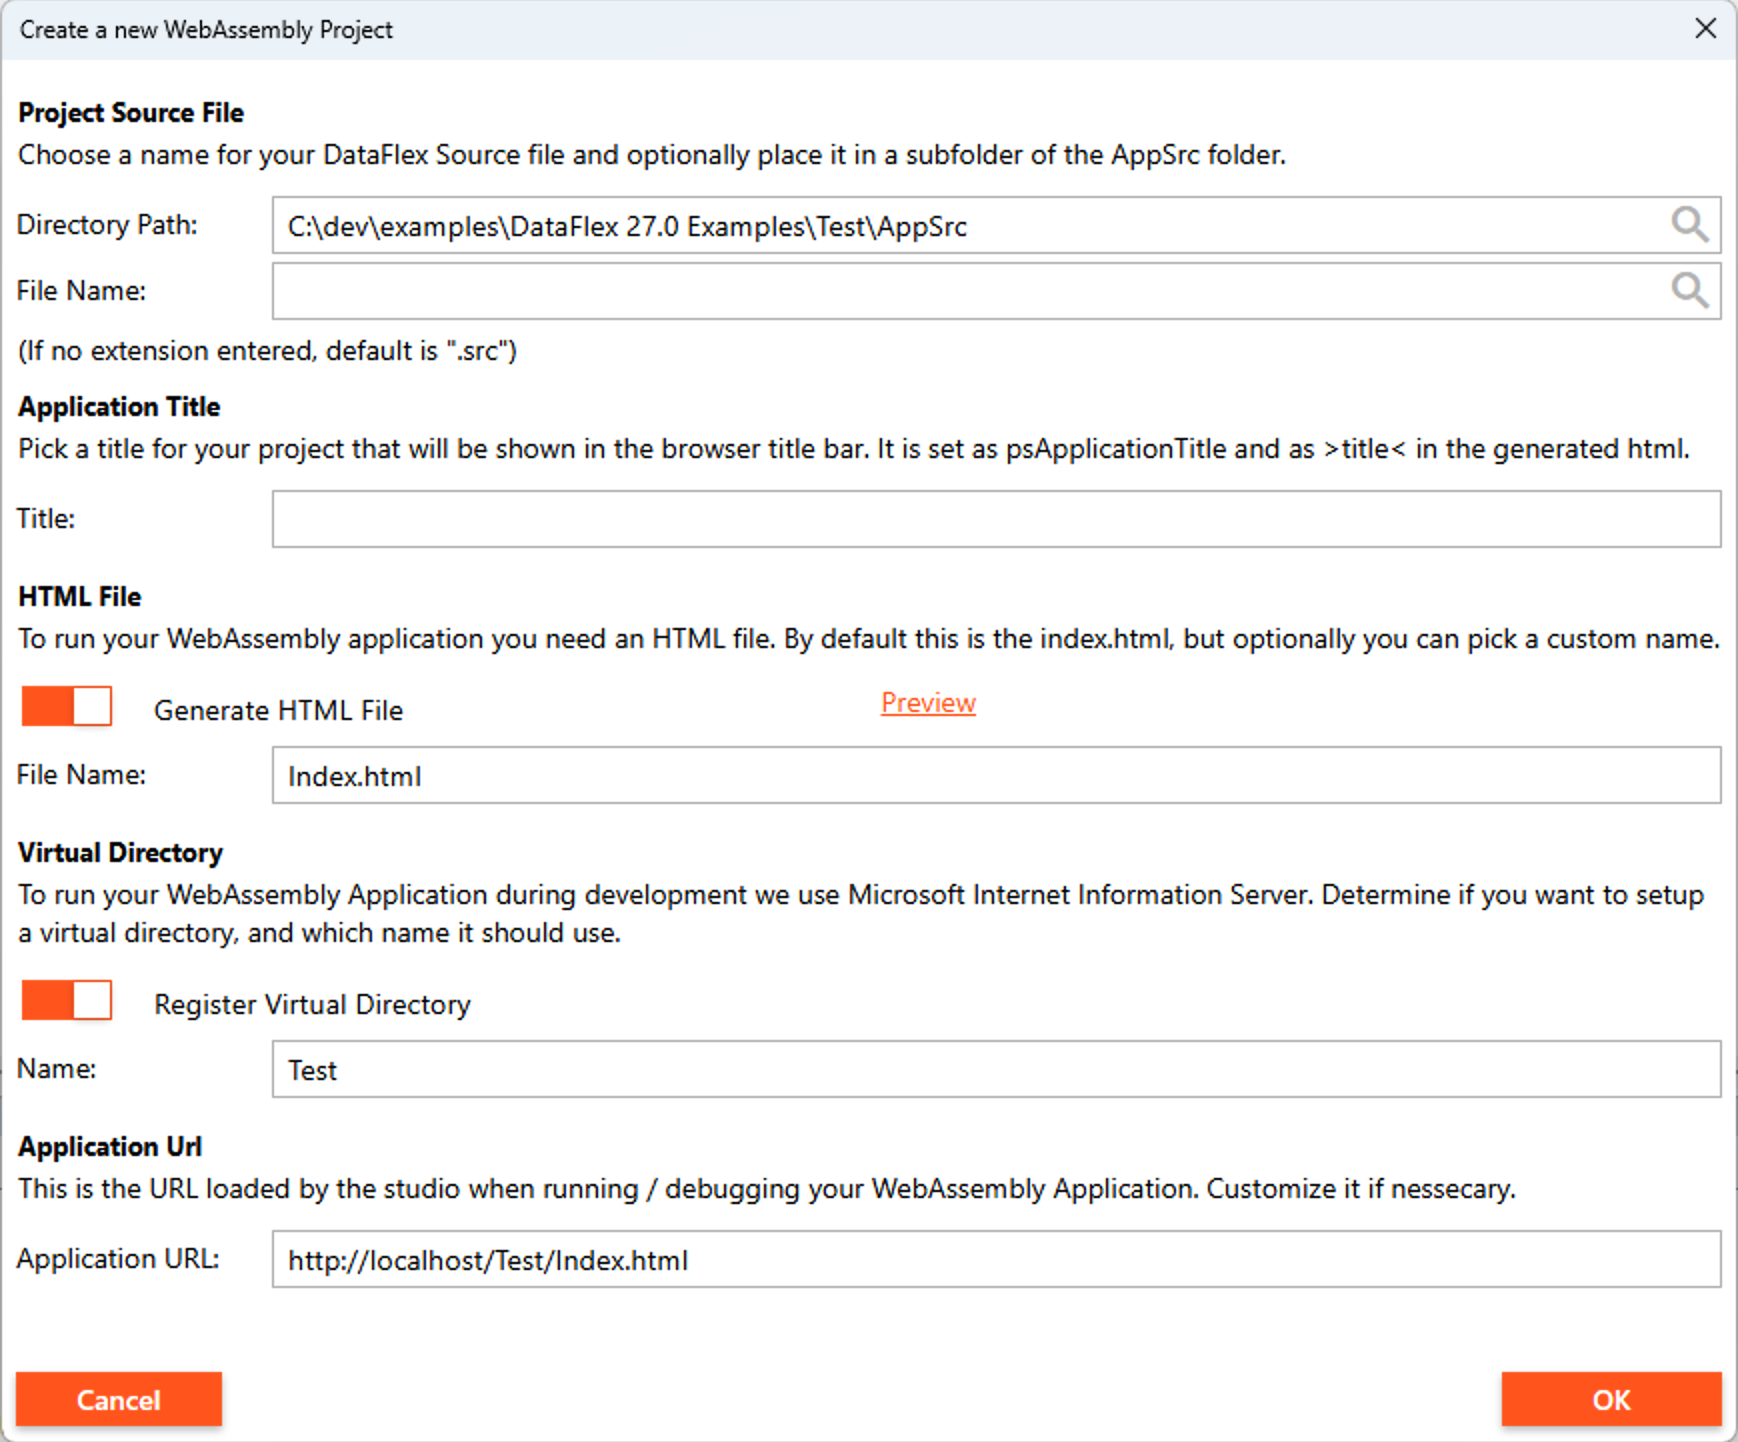
You choose where to store the project and what name to give it. You can also give it an Application Title, which is the name shown on the browser tab later (it is set as psApplicationTitle and as the <title> in the generated HTML). Generally you can leave the HTML File (Index.html) at its default unless you know what you are doing or are mixing projects.
The most important part here is the Virtual Directory. DataFlex Windows WebAppServer applications only deal with HTTP requests to the application, with IIS additionally serving the AppHtml directory. WebAppClient applications work differently: they use the wasm-32 toolchain flavor of the TechStack runtime, and the great thing about these is that the DataFlex runtime runs your application completely inside the browser. (How that works, we'll see in a bit.)
The main point is that WebAppClients don't need to handle HTTP requests themselves. IIS only needs to serve the DataFlex runtime files, the HTML, CSS, and JavaScript, and finally your DataFlex application. During development the Studio uses Microsoft Internet Information Server (IIS): the Register Virtual Directory option sets up a virtual directory (named Test here), and the Application URL (http://localhost/Test/Index.html) is what the Studio loads when running or debugging.
When you press OK, the project is created and the Studio stays busy in the background — you can follow this in the Output panel as it installs the necessary packages from the package manager. Among them is a peculiar one: DataFlex-dev/WebAssembly Runtime.
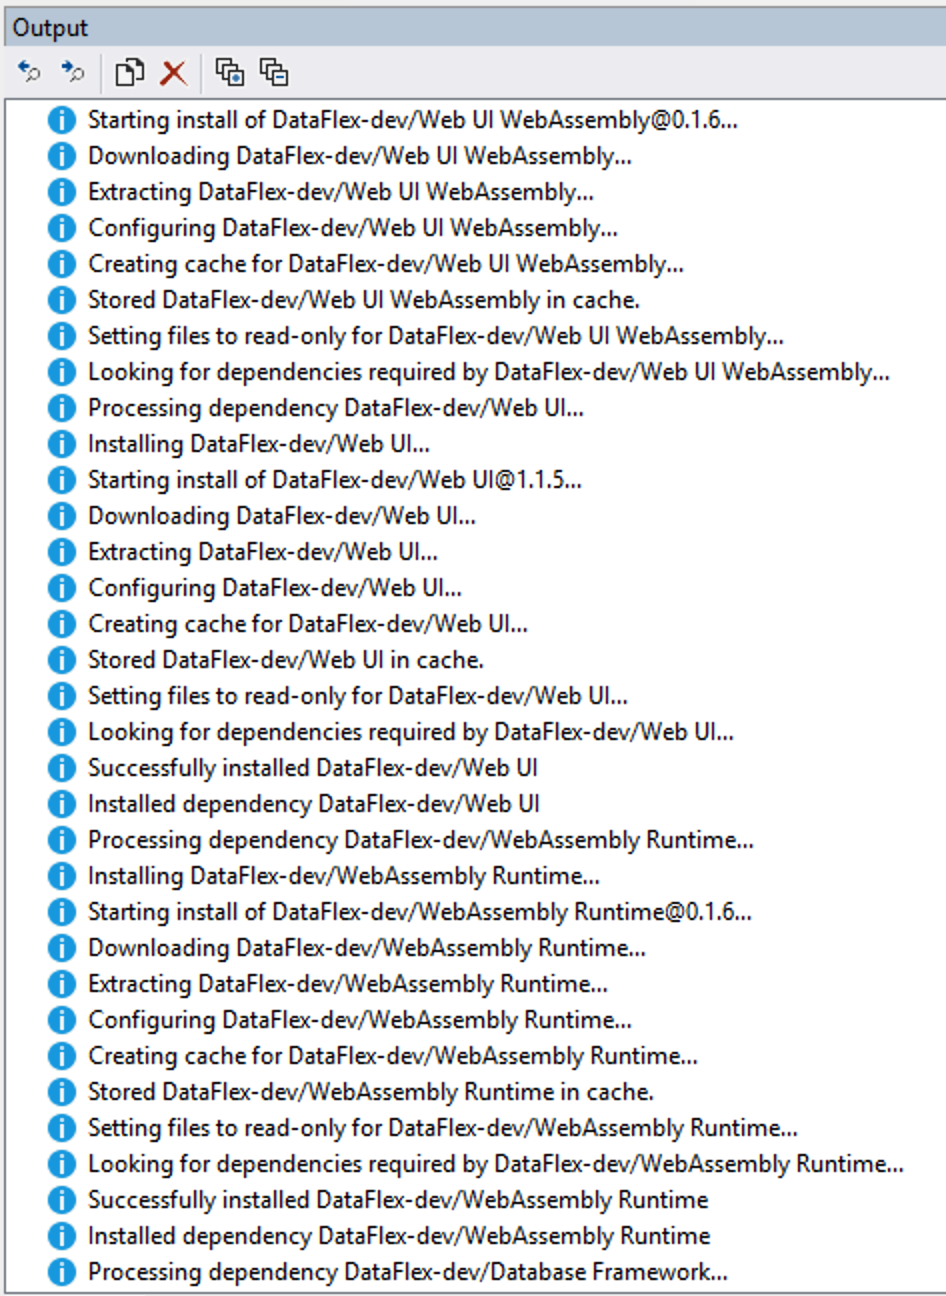
This package installs the WebAssembly version of the runtime, and so it differs a little — for now — from the toolchain model described earlier. To provide updates as easily as possible, the WebAssembly runtime is delivered as a package: it automatically adds all the JavaScript, WebAssembly, and other files it needs and modifies Index.html accordingly, setting up your project in one go. As a result, you receive runtime updates through the package manager in the Studio whenever they are needed.
There is one small caveat: this package does not include a compiler, which still needs to be installed separately. The runtime and compiler versions are allowed to differ, but it is something to be aware of while working with the technical preview. In the future this will no longer be a concern.
Step 6 — Build, run, and verify in the browser
Press F5 or the play button. Your application is built and a web browser window opens. Compared to WebAppServer development, launching a WebAssembly application while debugging can take a little longer at first. Why? The debugger and the browser talk to each other, and each has to wait for the other to be ready. This isn't DataFlex-specific — similar platforms such as Blazor behave the same way.
Once the debugger has fully attached to the browser tab, the application launches in a matter of milliseconds, and you are greeted by a familiar screen: a basic drilldown application.
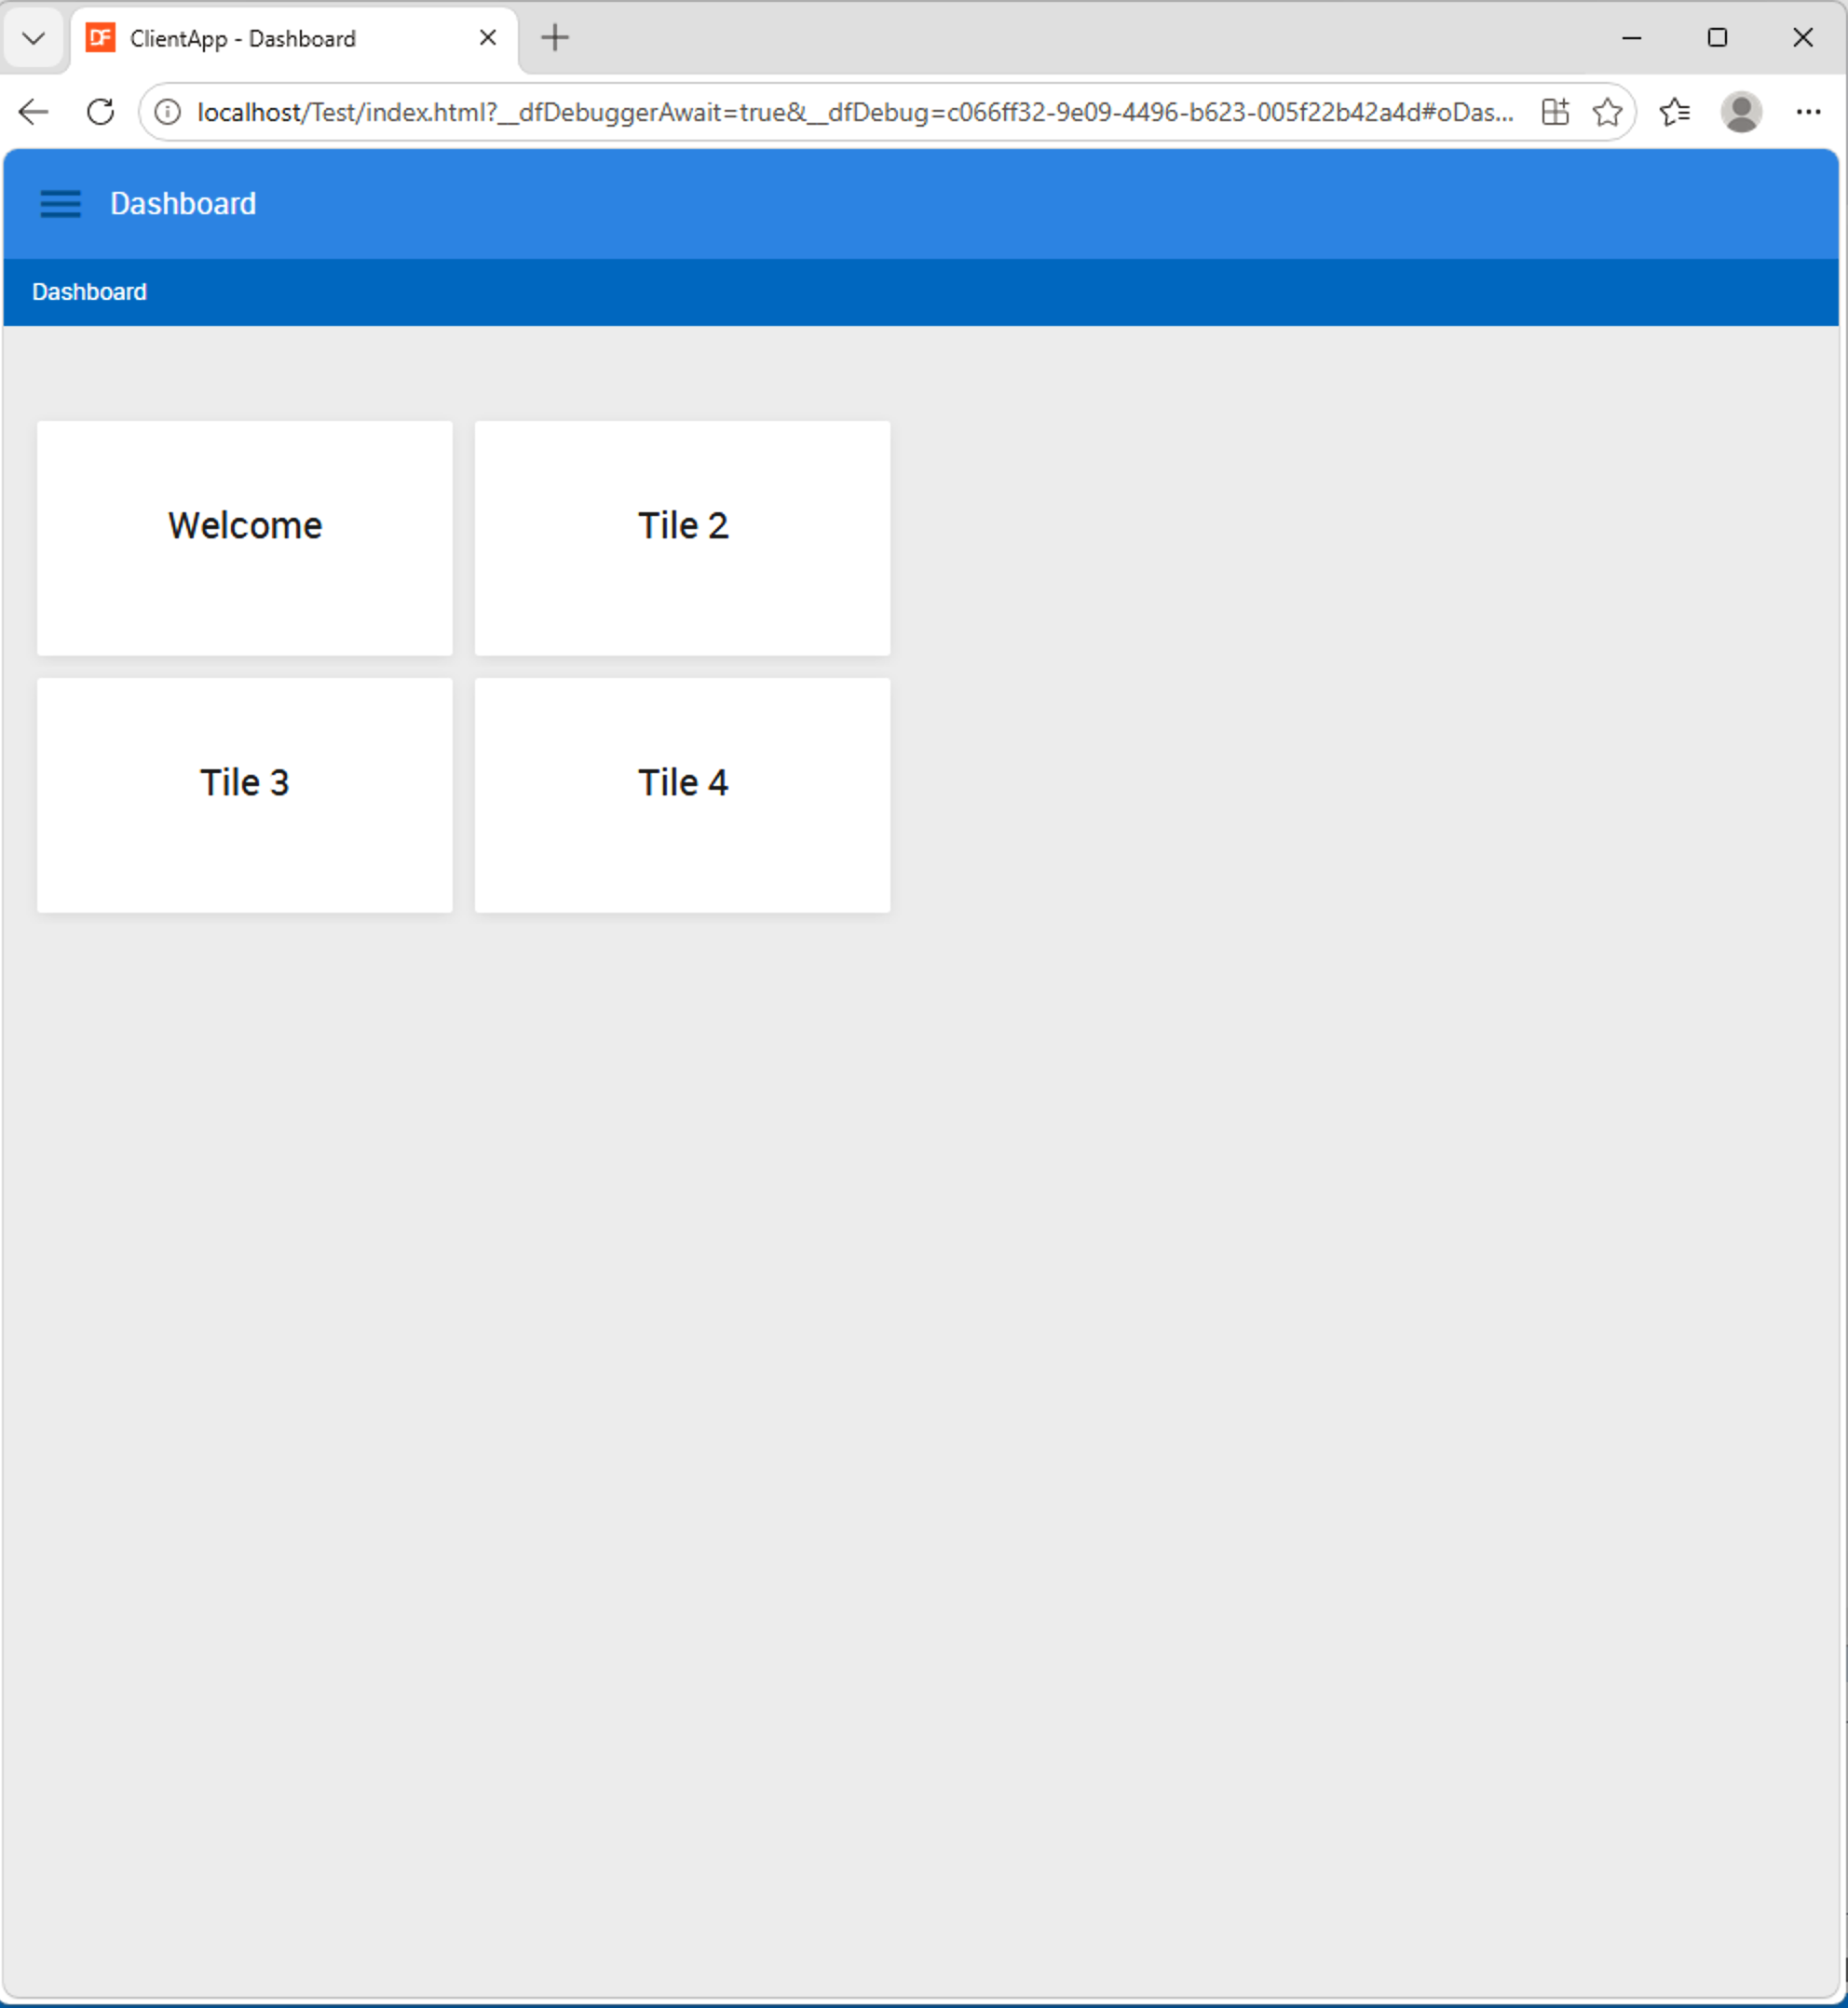
This is the interesting part of the whole TechStack project: while the foundations of DataFlex are completely new, visually nothing has changed — which is partly exactly the intention. You will feel the difference, though, as you navigate your applications: every interaction happens on-device and is extremely fast. Thanks to WebAssembly and on-device optimizations, in some cases it even outperforms the native runtime versions of DataFlex Windows and the new runtimes.
How can you tell this is a WebAssembly application? First, the Output panel again shows that the +wasm-32 toolchain version was used. More peculiar, though: the output is no longer an .exe — it is an .flx file.
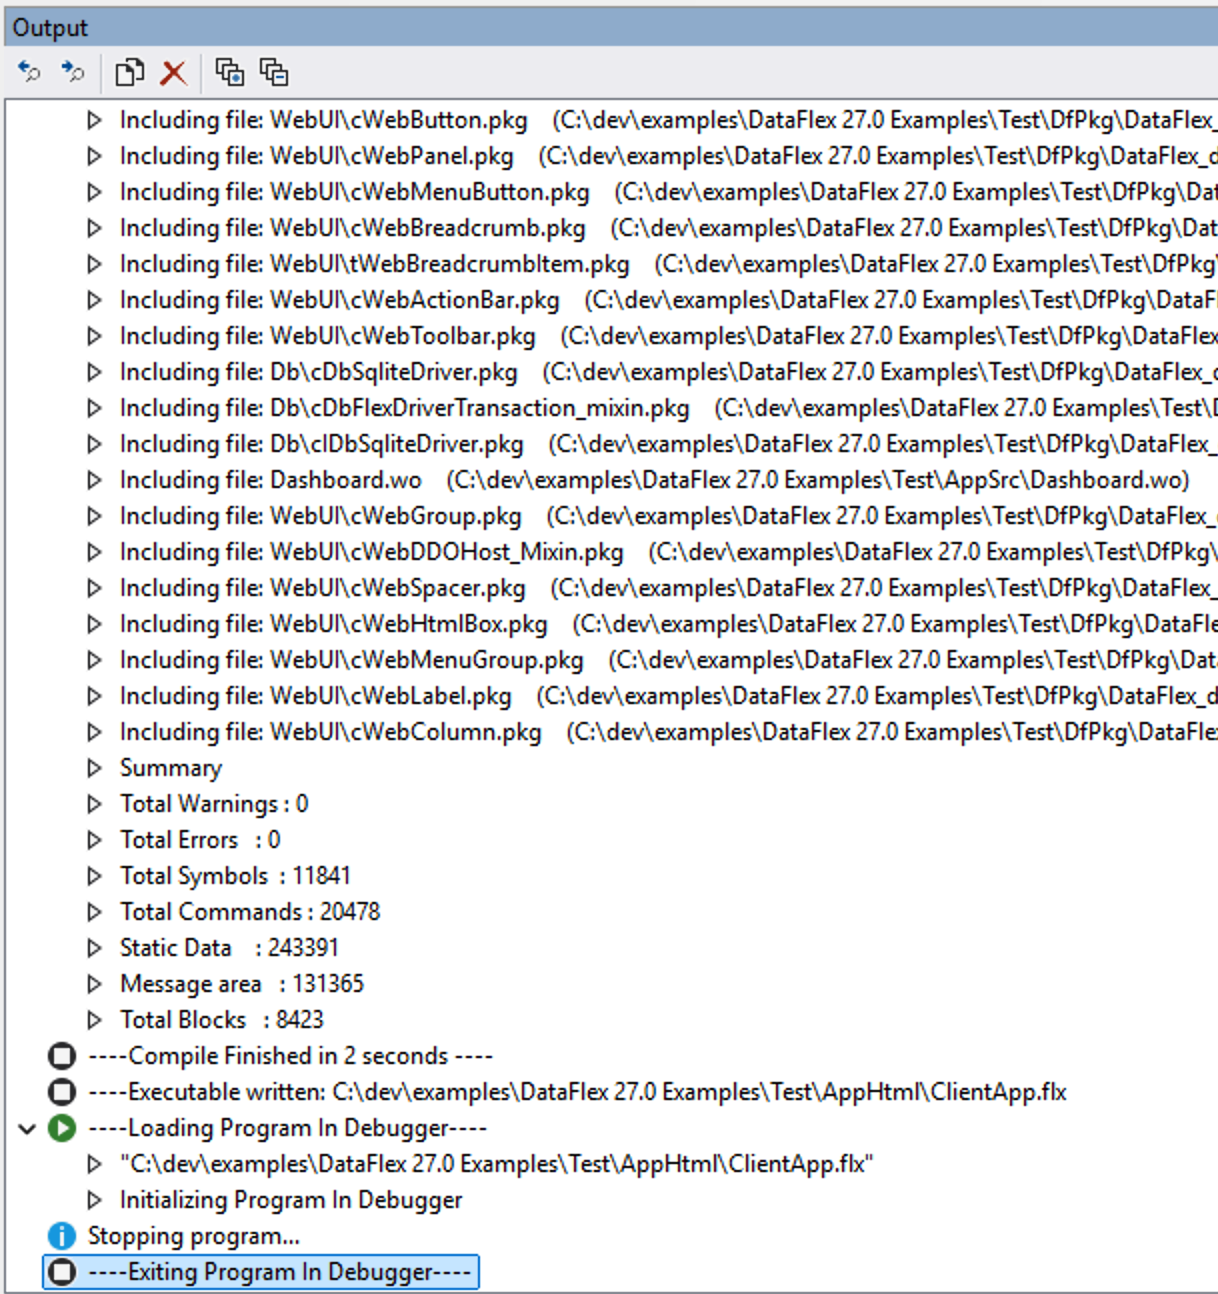
Long-time DataFlex users may find this familiar. An .flx file — similar to a .jar for Java — is just the DataFlex executable on its own, rather than wrapped in the bootstrapper. Separating the DataFlex application from the runtime this way allows for better caching.
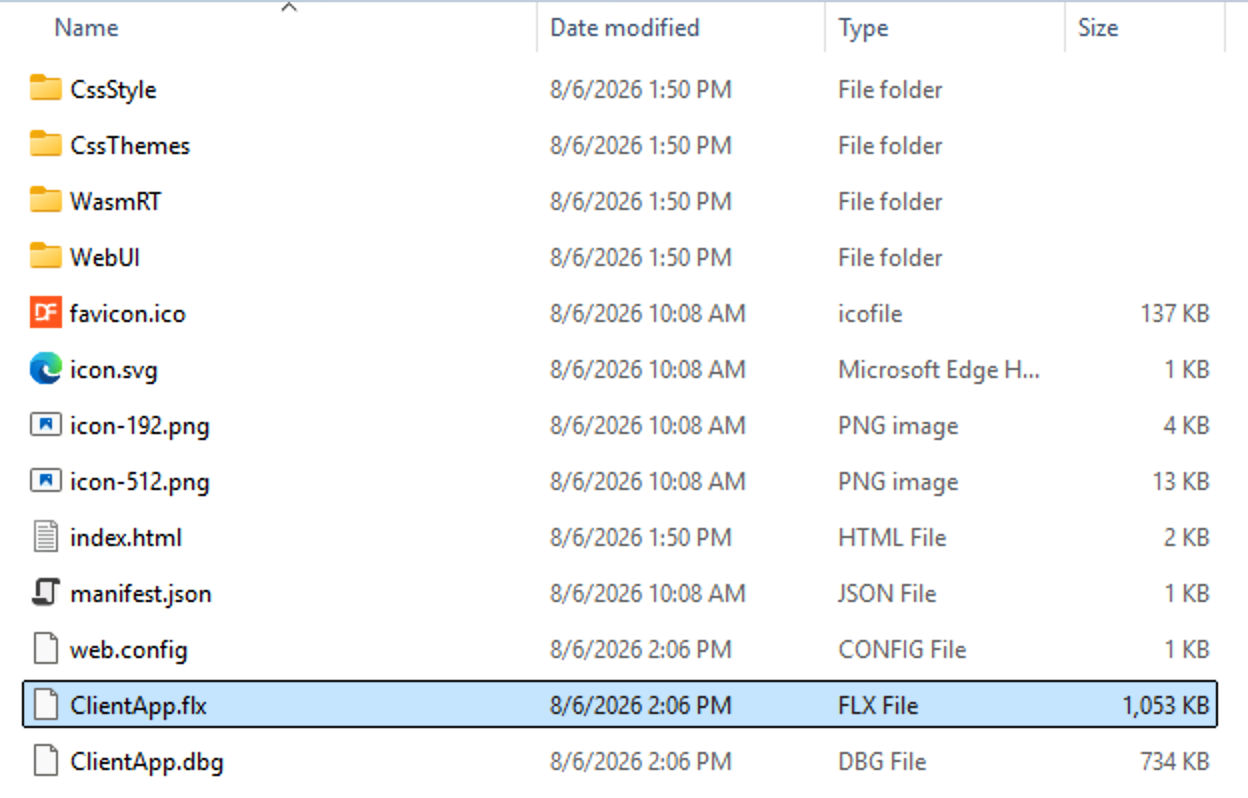
If you look at your project's AppHtml directory, you'll see this is where the .flx was written — making it available to the web browser for download. Alongside it is the DataFlex runtime, in the WasmRT directory. This directory contains everything the browser needs to initialize the DataFlex runtime and boot your application.
You can watch all of this load in the browser. Open the developer tools with F12 (or through the browser menu) and go to the Network tab — you may need to refresh the page to see the requests. First the DataFlex runtime (the .js and combined .wasm files) is downloaded, and then your .flx file.
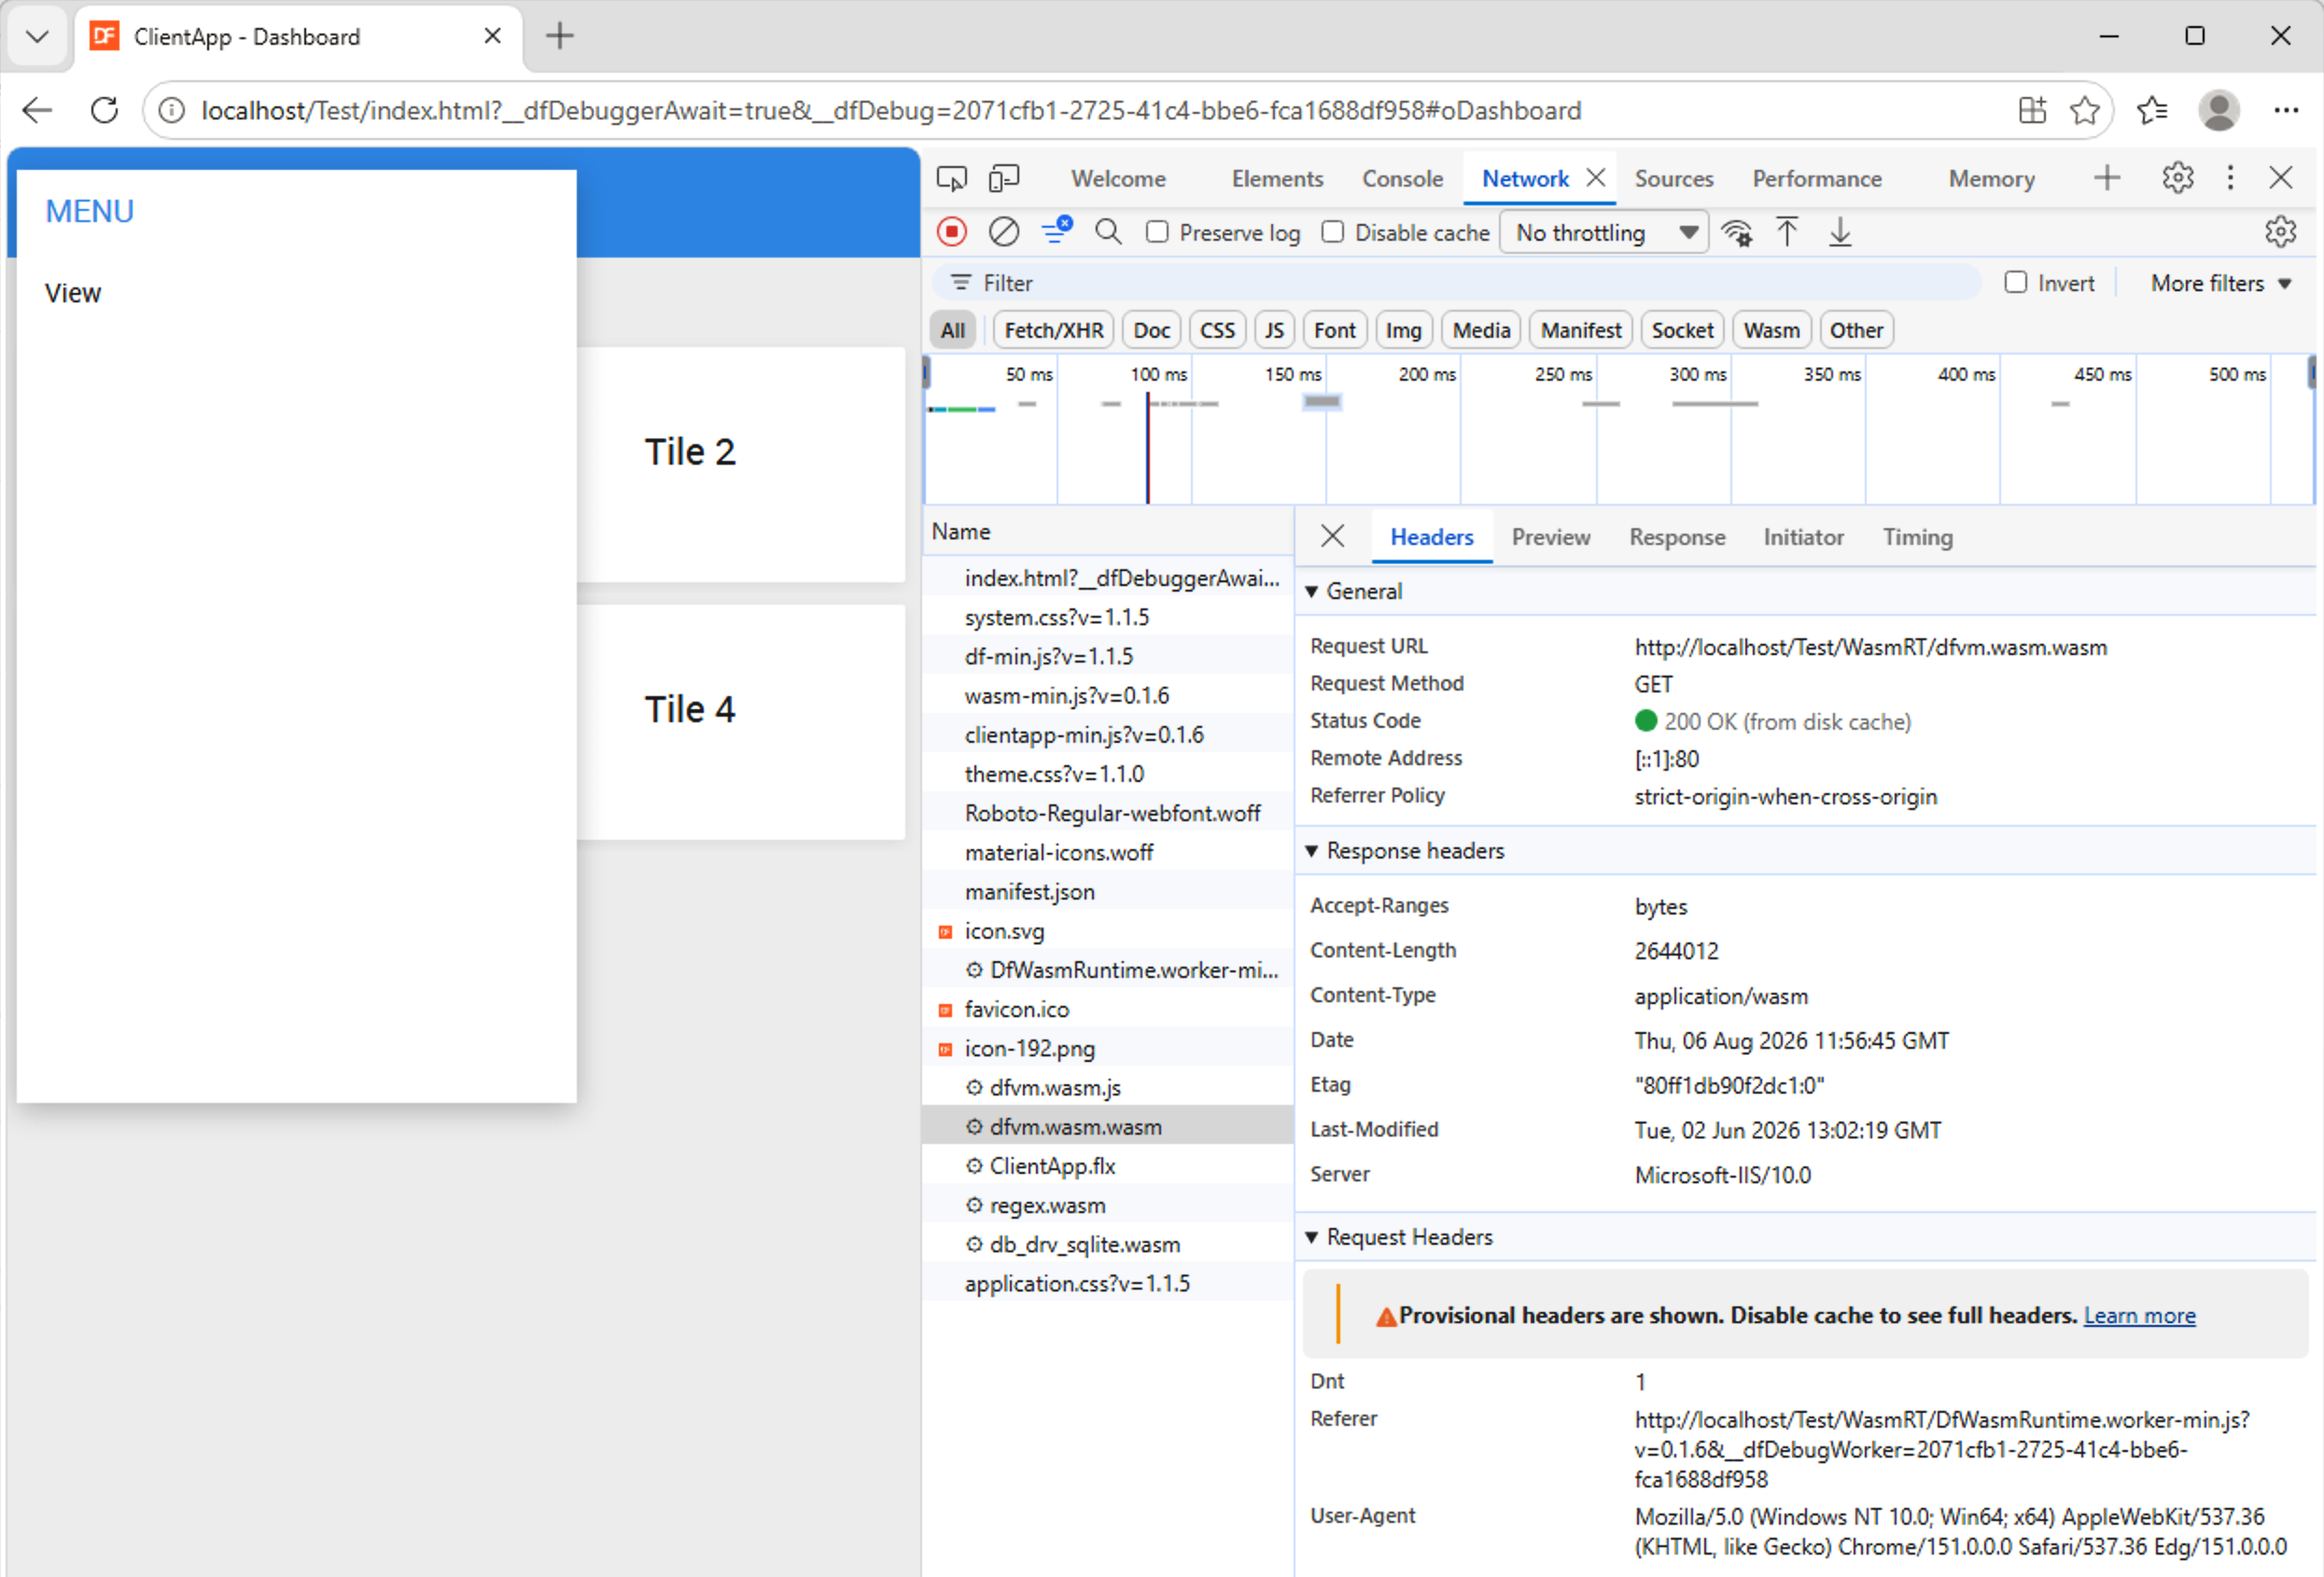
Look closely and you'll see the DataFlex runtime was cached — here the request for dfvm.wasm.wasm returns 200 OK (from disk cache). This is the second time this application was opened, and it shows how applications load faster on subsequent visits: the browser doesn't need to fetch all components again.
Now click the hamburger menu and then the dashboard — notice that nothing new appears in the Network tab. This is exactly what we want: all logic runs on-device, based on the logic you programmed into your application. Your application only needs to reach a server for data.
This makes it possible to build "offline"-capable — or rather "optionally online" — applications that work anywhere on earth, instead of depending on the latency of your internet provider and location for every single click.
Step 7 — Recap: what you built
You now have one workspace containing two projects, built and run three different ways. The toolchain you select decides what the compiler produces and where the application runs:
| Toolchain | Build output | How it runs |
|---|---|---|
27.0.0+windows-64 |
Test.exe in Programs\ |
Started in the debugger, printing to the Windows Output Window |
0.1.6+native-64 |
Test.exe in Programs\ |
Started in a command prompt (headless by default), loading dfvm-runtimelib.dll and platform-lib.dll from the toolchain directory |
0.1.6+wasm-32 |
ClientApp.flx in AppHtml\ |
Downloaded and run in the browser by the runtime in WasmRT, and cached for later visits |
The first two rows are the same process project rebuilt under a different toolchain; the third is the WebAppClient project. The DataFlex source you write does not change — the toolchain does.
Where to go next
That completes the main walkthrough. You have a TechStack workspace, you know how to add projects to it, and you know how the selected toolchain decides whether your application runs as a native executable or inside the browser.
From here the Studio is familiar ground: DataFlex developers who know the ecosystem can go on creating views, dialogs, and business logic as they always have. The biggest change is Data, and that is covered separately.
| Where | What you'll find |
|---|---|
| Samples | Complete, runnable TechStack applications, including the Conference App. |
| Tutorials | Step-by-step guides on individual subjects, building features from first principles to complete workflows. |
| 2. Toolchains | The toolchain model: flavors, versions, install locations, and the toolchain selector. |
| API Reference | Class and topic reference for the TechStack APIs. |